What This Guide Covers
- Setting Up a Webhook Integration: How to configure a webhook column in Bitscale.
- Example Use Case: Sending dynamic messages to a Slack channel.
- Best Practices and Next Steps: Tips for exploring advanced webhook use cases.
1. Setting Up a Webhook Integration
 The webhook action column in Bitscale enables seamless data transmission to external tools. Here’s how to set it up:
Steps to Configure a Webhook Integration
-
Add a Webhook Action Column:
- Go to your Bitscale grid.
- Click Add Column, select Action Column, and choose Webhook from the integration tools.
-
Input the Webhook URL:
- Paste the URL of the webhook you want to integrate.
- This is the endpoint where your payload (data) will be sent.
-
Define the Payload:
- Specify the information you want to send in the payload.
- For example, you can include dynamic values from your grid, such as names or messages.
-
Save and Run:
- Save the column configuration and execute the action to test the integration.
Pro Tip: Always review the documentation of the webhook you’re connecting to ensure you’re sending the correct payload format.
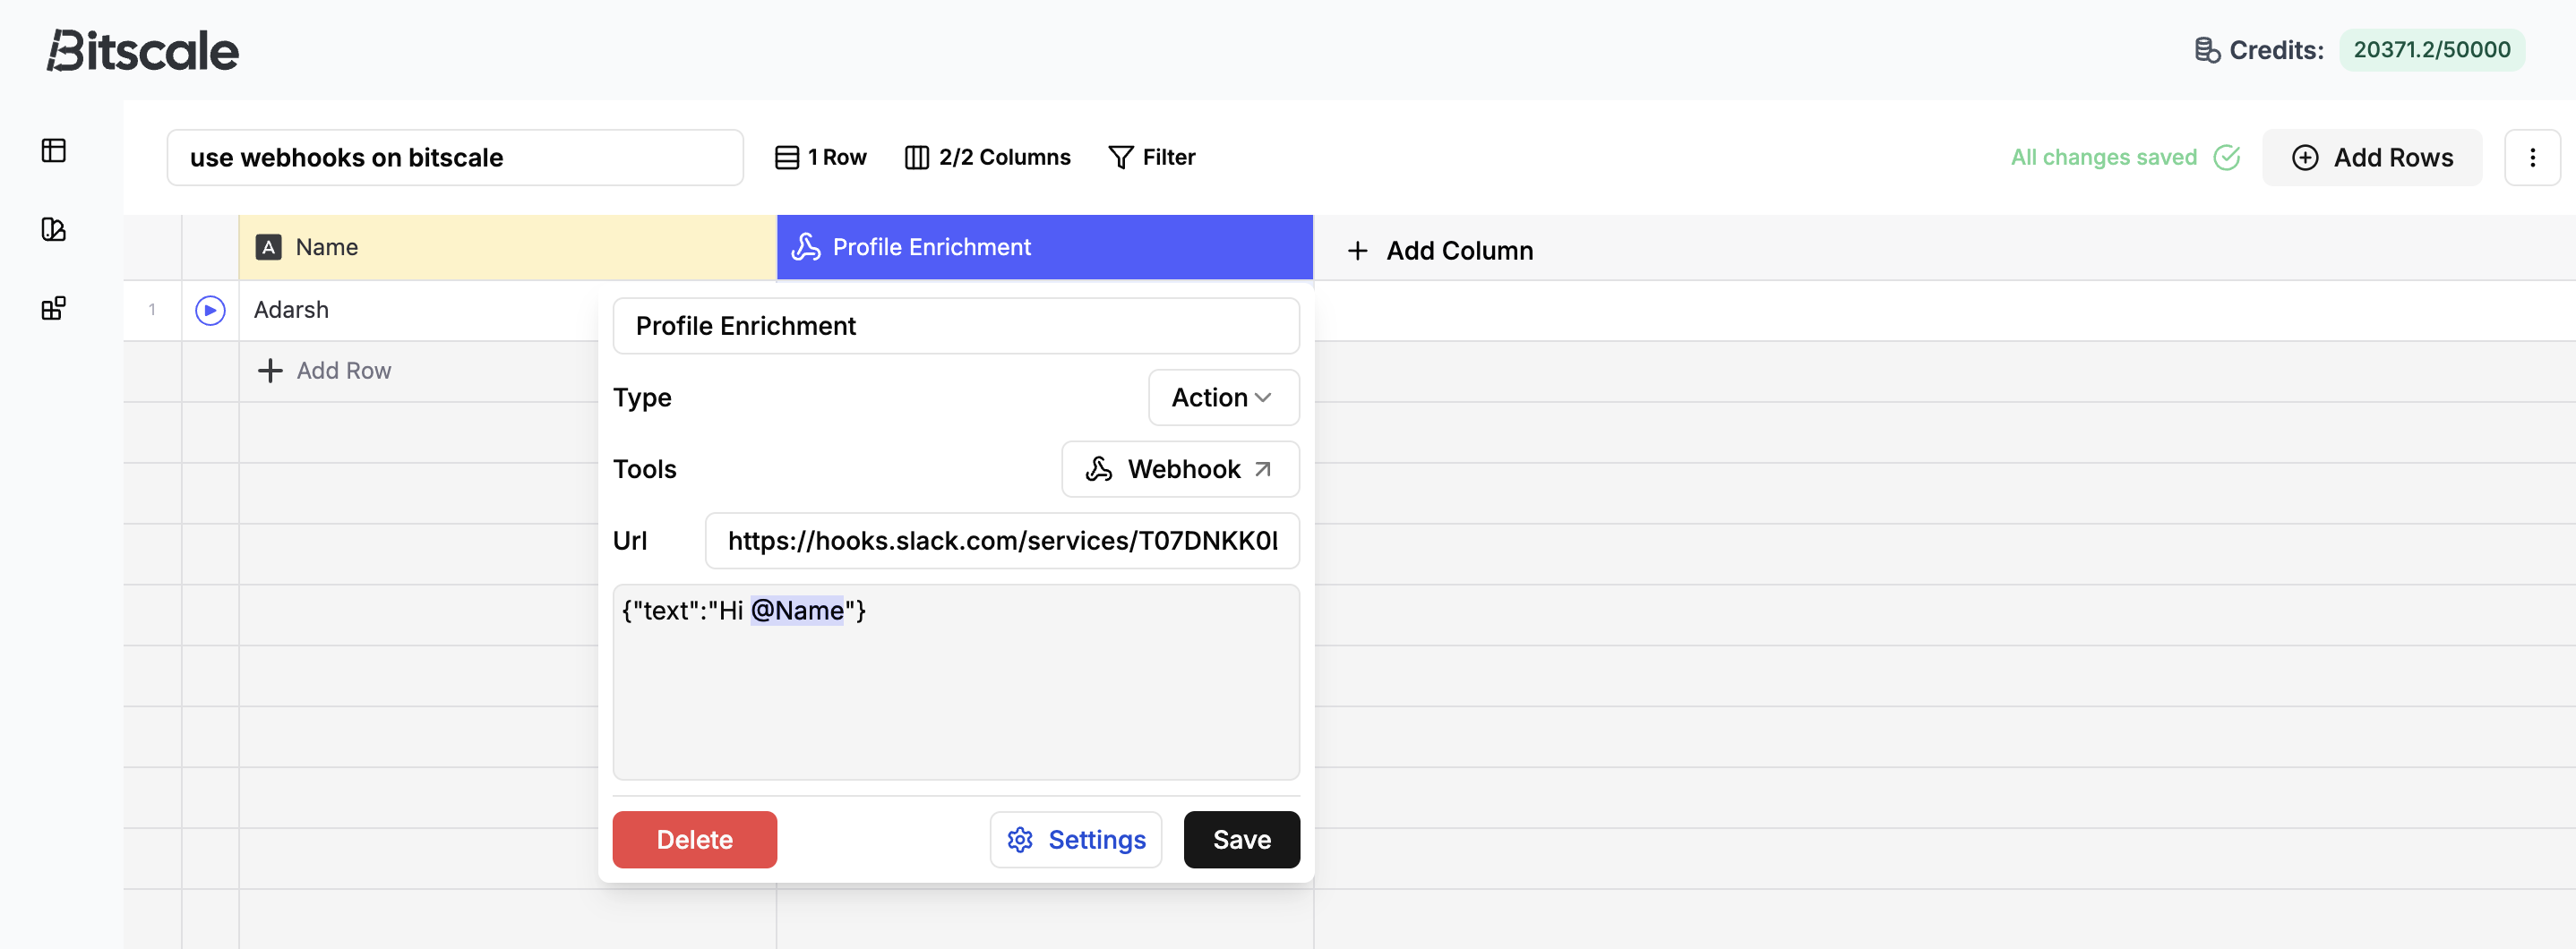
2. Example Use Case: Sending Slack Notifications
To demonstrate the power of webhook integrations, let’s walk through an example of sending dynamic messages to a Slack channel:Use Case: Pushing Messages to Slack
-
Create a Slack App:
- Set up a Slack app with webhook functionality to send messages to a specific channel.
-
Configure the Webhook in Bitscale:
- Add a webhook action column and paste the Slack webhook URL.
- Define the payload to include a message and dynamic variables (e.g., names from your grid).
-
Run the Column:
- Execute the column to send the message. Check the Slack channel to confirm receipt.
Result: You’ll see a dynamic message like “Hi, John!” in your Slack channel.
3. Best Practices and Advanced Use Cases
Best Practices
- Test Before Deploying: Run a sample payload to verify the webhook integration works as expected.
- Understand Your Webhook: Review the webhook’s documentation to ensure proper configuration and payload formatting.
- Use Dynamic Fields: Leverage grid columns to send dynamic data like names, emails, or statuses.
Advanced Use Cases
- Complex Workflows: Combine webhook integrations with other action columns to trigger multi-step processes.
- Custom Notifications: Set up notifications for task updates, report generation, or any event requiring real-time alerts.
- Third-Party Integrations: Use webhooks to connect with platforms like Trello, Google Sheets, or CRMs.
4. Next Steps
Now that you’ve seen how easy it is to set up a webhook integration, it’s time to explore use cases that fit your specific workflows. You can find a sample grid here.Need Help? Reach out to us on our community channel with any questions or ideas for using webhook integrations.