> ## Documentation Index
> Fetch the complete documentation index at: https://docs.bitscale.ai/llms.txt
> Use this file to discover all available pages before exploring further.
# How to run Grids on Bitscale
Try Bitscale Now!
## What a grid means in Bitscale
A **grid** is how Bitscale represents a **workflow**.
* Each **row** is an entry (example: a person, a lead, an account)
* Each **column** is a step in the workflow (example: find email, find phone, enrich account)
These workflows are commonly used for GTM tasks like:
* finding emails and phone numbers
* account enrichment
* outbound creation
* outbound automation
## Run a grid manually
There are four manual ways to run a grid, depending on what you want to process.
### 1. Run a single cell (one step for one entry)
Use this when you want to run just one step for one specific row.
1. Hover over the cell you want to run.
2. Click the run option for that cell.
Example: run **Email Waterfall** only for a single person to find or refresh their email.
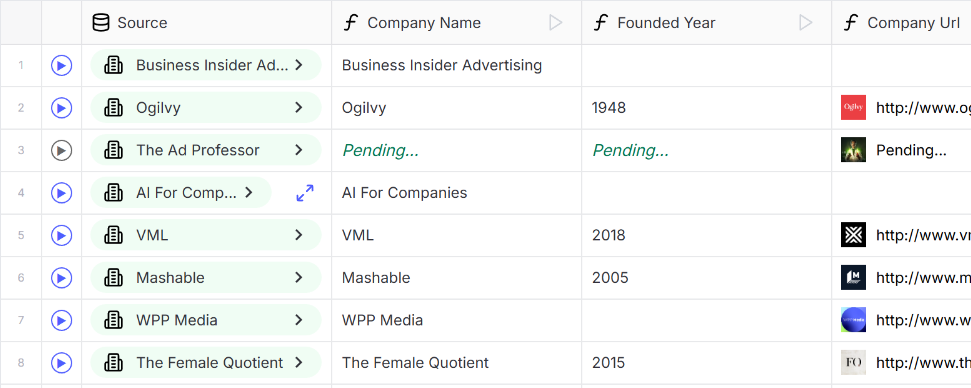
### 2. Run an entire row (all steps for one entry)
Use this when you want to fully process one entry across every step.
1. Go to the row you want.
2. Click the **Play** button on that row.
3. Bitscale runs all workflow steps for that entry.
Example: for one person, find both email and phone numbers in one go.
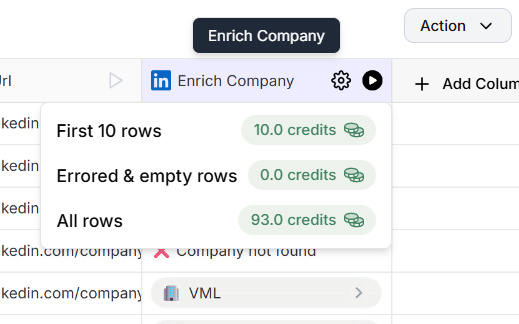
### 3. Run an entire column (one step for many entries)
Use this when you want to run one step across multiple rows.
1. Go to the column (workflow step) you want to run.
2. Click the **Play** button on that column.
3. Choose how you want to run it:
* first 10 rows
* errored and empty rows
* all rows
4. Run it.
Example: run **Phone Waterfall** for all entries.
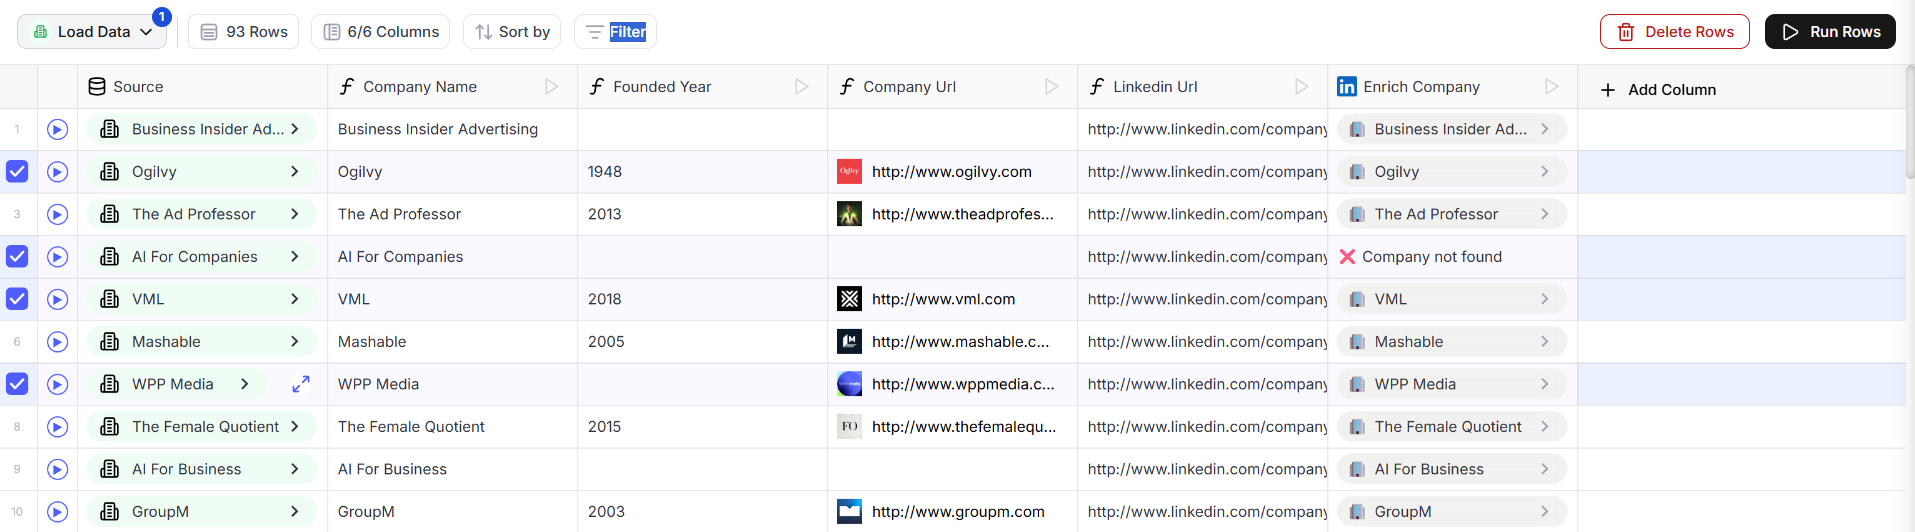
### 4. Multi-select run (all steps for selected entries)
Use this when you want to run full workflows for a subset of rows, or the whole grid.
1. Select rows by:
* clicking and dragging
* clicking specific rows
* selecting all rows using the select-all button
2. Click **Run rows**.
3. Bitscale runs all steps for all selected rows.
If you select all rows and run, you are effectively running the entire grid.
## Automate your grid (auto run)
Grids are workflows, and workflows can be automated.
Auto run is best when new rows keep coming in and you want the workflow to process them automatically.
### Option 1: Auto run when a new entry comes in (webhooks or external feeders)
If you already have a system feeding rows into a grid using webhooks or another automated source:
1. Enable **Auto run** from the bottom-right panel.
2. Whenever a new entry is received, Bitscale automatically runs all subsequent steps for that entry.
### Option 2: Schedule a data source, then auto run
If you do not have an external feeder system, you can still automate by scheduling your data source.
1. Go to the **Load Data** tab.
2. Select the data source connected to the grid.
3. Set a schedule frequency.
* from 30 minutes to monthly
4. Enable **Auto run**.
Now whenever a new entry is pulled in by the schedule, the workflow steps run automatically.
## Examples of when scheduling is useful
* **Monthly schedules**: CRM re-enrichment, CRM cleanup
* **30-minute schedules**: new website signups, newsletter signups, routing an SDR alert, triggering outreach quickly
## Need help?
If you have questions about workflows or grid runs, reach out on the community channel and the team will help.
 1. Hover over the cell you want to run.
2. Click the run option for that cell.
Example: run **Email Waterfall** only for a single person to find or refresh their email.
### 2. Run an entire row (all steps for one entry)
Use this when you want to fully process one entry across every step.
1. Hover over the cell you want to run.
2. Click the run option for that cell.
Example: run **Email Waterfall** only for a single person to find or refresh their email.
### 2. Run an entire row (all steps for one entry)
Use this when you want to fully process one entry across every step.
 1. Go to the row you want.
2. Click the **Play** button on that row.
3. Bitscale runs all workflow steps for that entry.
Example: for one person, find both email and phone numbers in one go.
### 3. Run an entire column (one step for many entries)
Use this when you want to run one step across multiple rows.
1. Go to the row you want.
2. Click the **Play** button on that row.
3. Bitscale runs all workflow steps for that entry.
Example: for one person, find both email and phone numbers in one go.
### 3. Run an entire column (one step for many entries)
Use this when you want to run one step across multiple rows.
 1. Go to the column (workflow step) you want to run.
2. Click the **Play** button on that column.
3. Choose how you want to run it:
* first 10 rows
* errored and empty rows
* all rows
4. Run it.
Example: run **Phone Waterfall** for all entries.
### 4. Multi-select run (all steps for selected entries)
Use this when you want to run full workflows for a subset of rows, or the whole grid.
1. Go to the column (workflow step) you want to run.
2. Click the **Play** button on that column.
3. Choose how you want to run it:
* first 10 rows
* errored and empty rows
* all rows
4. Run it.
Example: run **Phone Waterfall** for all entries.
### 4. Multi-select run (all steps for selected entries)
Use this when you want to run full workflows for a subset of rows, or the whole grid.
 1. Select rows by:
* clicking and dragging
* clicking specific rows
* selecting all rows using the select-all button
2. Click **Run rows**.
3. Bitscale runs all steps for all selected rows.
If you select all rows and run, you are effectively running the entire grid.
## Automate your grid (auto run)
Grids are workflows, and workflows can be automated.
Auto run is best when new rows keep coming in and you want the workflow to process them automatically.
### Option 1: Auto run when a new entry comes in (webhooks or external feeders)
If you already have a system feeding rows into a grid using webhooks or another automated source:
1. Enable **Auto run** from the bottom-right panel.
2. Whenever a new entry is received, Bitscale automatically runs all subsequent steps for that entry.
### Option 2: Schedule a data source, then auto run
If you do not have an external feeder system, you can still automate by scheduling your data source.
1. Go to the **Load Data** tab.
2. Select the data source connected to the grid.
3. Set a schedule frequency.
* from 30 minutes to monthly
4. Enable **Auto run**.
Now whenever a new entry is pulled in by the schedule, the workflow steps run automatically.
## Examples of when scheduling is useful
* **Monthly schedules**: CRM re-enrichment, CRM cleanup
* **30-minute schedules**: new website signups, newsletter signups, routing an SDR alert, triggering outreach quickly
## Need help?
If you have questions about workflows or grid runs, reach out on the community channel and the team will help.
1. Select rows by:
* clicking and dragging
* clicking specific rows
* selecting all rows using the select-all button
2. Click **Run rows**.
3. Bitscale runs all steps for all selected rows.
If you select all rows and run, you are effectively running the entire grid.
## Automate your grid (auto run)
Grids are workflows, and workflows can be automated.
Auto run is best when new rows keep coming in and you want the workflow to process them automatically.
### Option 1: Auto run when a new entry comes in (webhooks or external feeders)
If you already have a system feeding rows into a grid using webhooks or another automated source:
1. Enable **Auto run** from the bottom-right panel.
2. Whenever a new entry is received, Bitscale automatically runs all subsequent steps for that entry.
### Option 2: Schedule a data source, then auto run
If you do not have an external feeder system, you can still automate by scheduling your data source.
1. Go to the **Load Data** tab.
2. Select the data source connected to the grid.
3. Set a schedule frequency.
* from 30 minutes to monthly
4. Enable **Auto run**.
Now whenever a new entry is pulled in by the schedule, the workflow steps run automatically.
## Examples of when scheduling is useful
* **Monthly schedules**: CRM re-enrichment, CRM cleanup
* **30-minute schedules**: new website signups, newsletter signups, routing an SDR alert, triggering outreach quickly
## Need help?
If you have questions about workflows or grid runs, reach out on the community channel and the team will help.